GitHub Integration Manual
How to connect your GitHub repositories to HAY
Prerequisites
Before you begin, make sure you have the following:- An active HAY account with manager or admin access.
- An active GitHub account with read access to the organization and repositories you wish to import data from.
Important:- If you’re not the admin on GitHub, you will have to ask the organization admin to approve the HAY.work GitHub app.
- GitHub authorization of the HAY app only happens once, and one user can authorize just one HAY organization. If you wish to use multiple HAY organizations, you will have to ask multiple people to be the authorizers.
- The person authorizing HAY must have at least read permission for all repositories you plan to analyze. Note that this person does not need to be an admin of the GitHub organization.
Step 1: Connect your GitHub account
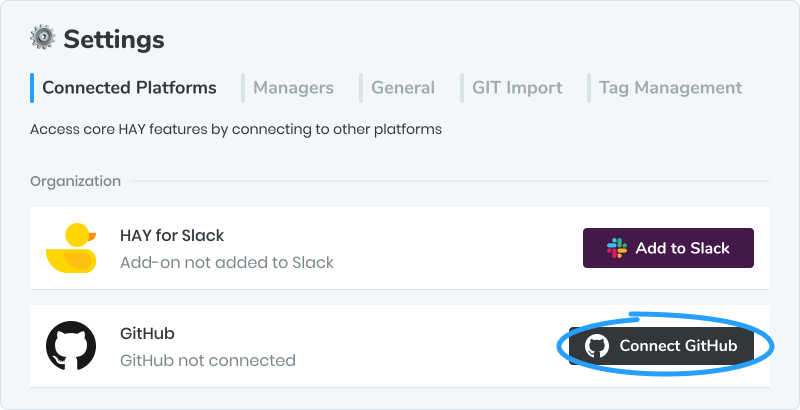
- Navigate to Settings via the menu located in the upper right corner or in the sidebar.
- On the Connected Platforms tab, connect your GitHub account by clicking on the Connect GitHub button. You will then be taken to GitHub’s authorization page. This step will ensure that you have access to the repositories and organizations in HAY that you do on GitHub.

Step 2: Authorize HAY.work on GitHub
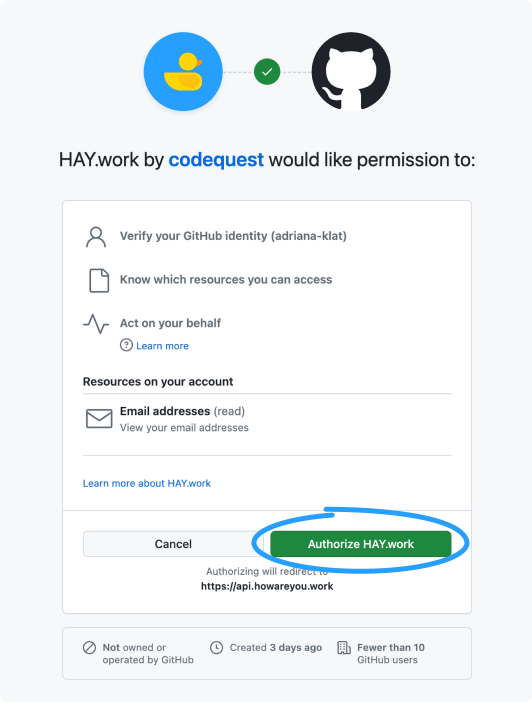
- On the GitHub authorization page, review the permissions that HAY.work is requesting.
- Confirm that the GitHub account displayed is the correct one.
- If you agree to the permissions, click the Authorize HAY.work button.

Step 3: Select your GitHub organization
- After authorization, go back and navigate to the Git Import tab in Settings.
- Click Add GitHub organization.
- You’ll be once again taken to GitHub to choose the appropriate organization from the list of all the organizations your account has access to.
- If you're not the admin of your GitHub organization, now is the perfect time to request access to the organization's repositories.

Step 4: Set permissions for the HAY.work GitHub app
- Once you've gained access to an organization, you'll have the option to update HAY.work's repository access.
- Select Only select repositories if you want to specify which repositories HAY.work can access.
- Click on Select repositories and tick the checkboxes next to the repositories you wish to integrate.
- Confirm your selection.
Step 5: Update permissions in HAY
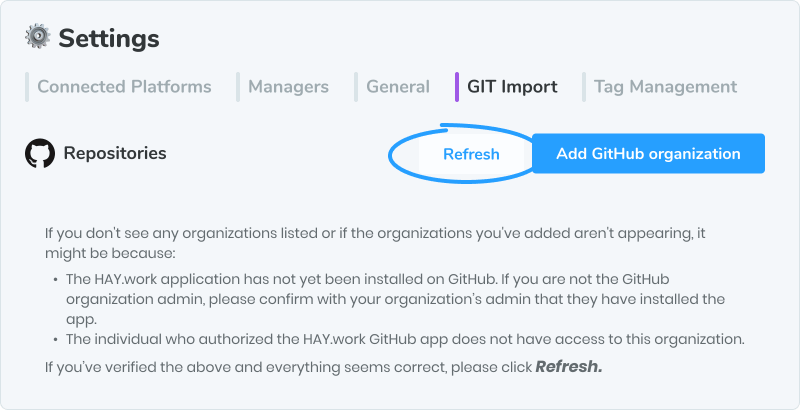
- After the HAY.work GitHub app is accepted into your GitHub organization, you’ll have to update the permissions to match their current state by clicking the Refresh button.
- If you still don’t see any organizations listed here, or if the organizations you’ve added aren’t appearing, it might be due to the following reasons:
- The HAY.work application has not yet been installed on GitHub. If you are not the GitHub organization admin, please confirm with your organization’s admin that they have installed the app.
- The individual who authorized the HAY.work GitHub app does not have access to this organization.
- Once you’ve clicked the button, the organization(s) you’ve given HAY access to should appear on the screen. They are now ready to start the import process.

Step 6: Import repositories into HAY
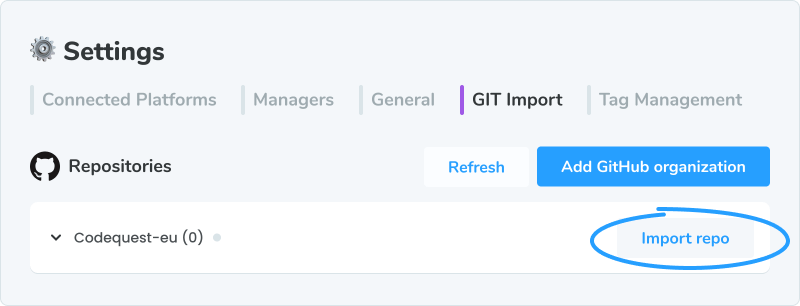
- Click on Import repos to start the synchronization process.
- In the popup screen, choose the repositories you want to import into HAY. Hint: Choosing the most recently active ones is your best bet here.
- You may need to wait a while as HAY.work imports the data from GitHub. Depending on the repository size, the import may take from minutes up to an hour.

Step 7: Finalize integration
- Once the import is complete, HAY.work will display the list of repositories now in sync.
- Verify that the correct repositories are listed with the status 'In sync'.
- The 'Last Imported' date should reflect the current date, indicating a successful import.

Step 8: Manage your repositories
- You can manage your repositories by clicking the Manage repos button.
- Here, you can update permissions, add more GitHub organizations, or synchronize additional repositories as needed.
Congratulations, you have successfully connected your GitHub repositories to HAY! The last step is…
Step 9: Connect the people in your team to their GitHub accounts
- Start by navigating over to the 'People' screen
- Choose the person you want to connect.
- Over on their profile, you should see a Assign GitHub account button. Click it.
- The search that has popped up contains all existing GitHub accounts. Type in the username of the person you want to assign a GitHub account to, and confirm your choice.

Et voilà! The HAY punchcard is now ready for analysis. Hope this manual has helped you successfully connect HAY and your GitHub organization. In case of any issues or feedback, please feel free to reach out to us at support@howareyou.work